Showing posts with label pretty. Show all posts

Saturday, 6 September 2014

Our cakes are better than the GBBO, we get to eat them too! 6/09/14


Whilst watching the Great British Bake Off I was thinking about all the amazing cakes from the past months made by me or my very talented family and friends. Too good not to share and they tasted amazing too!


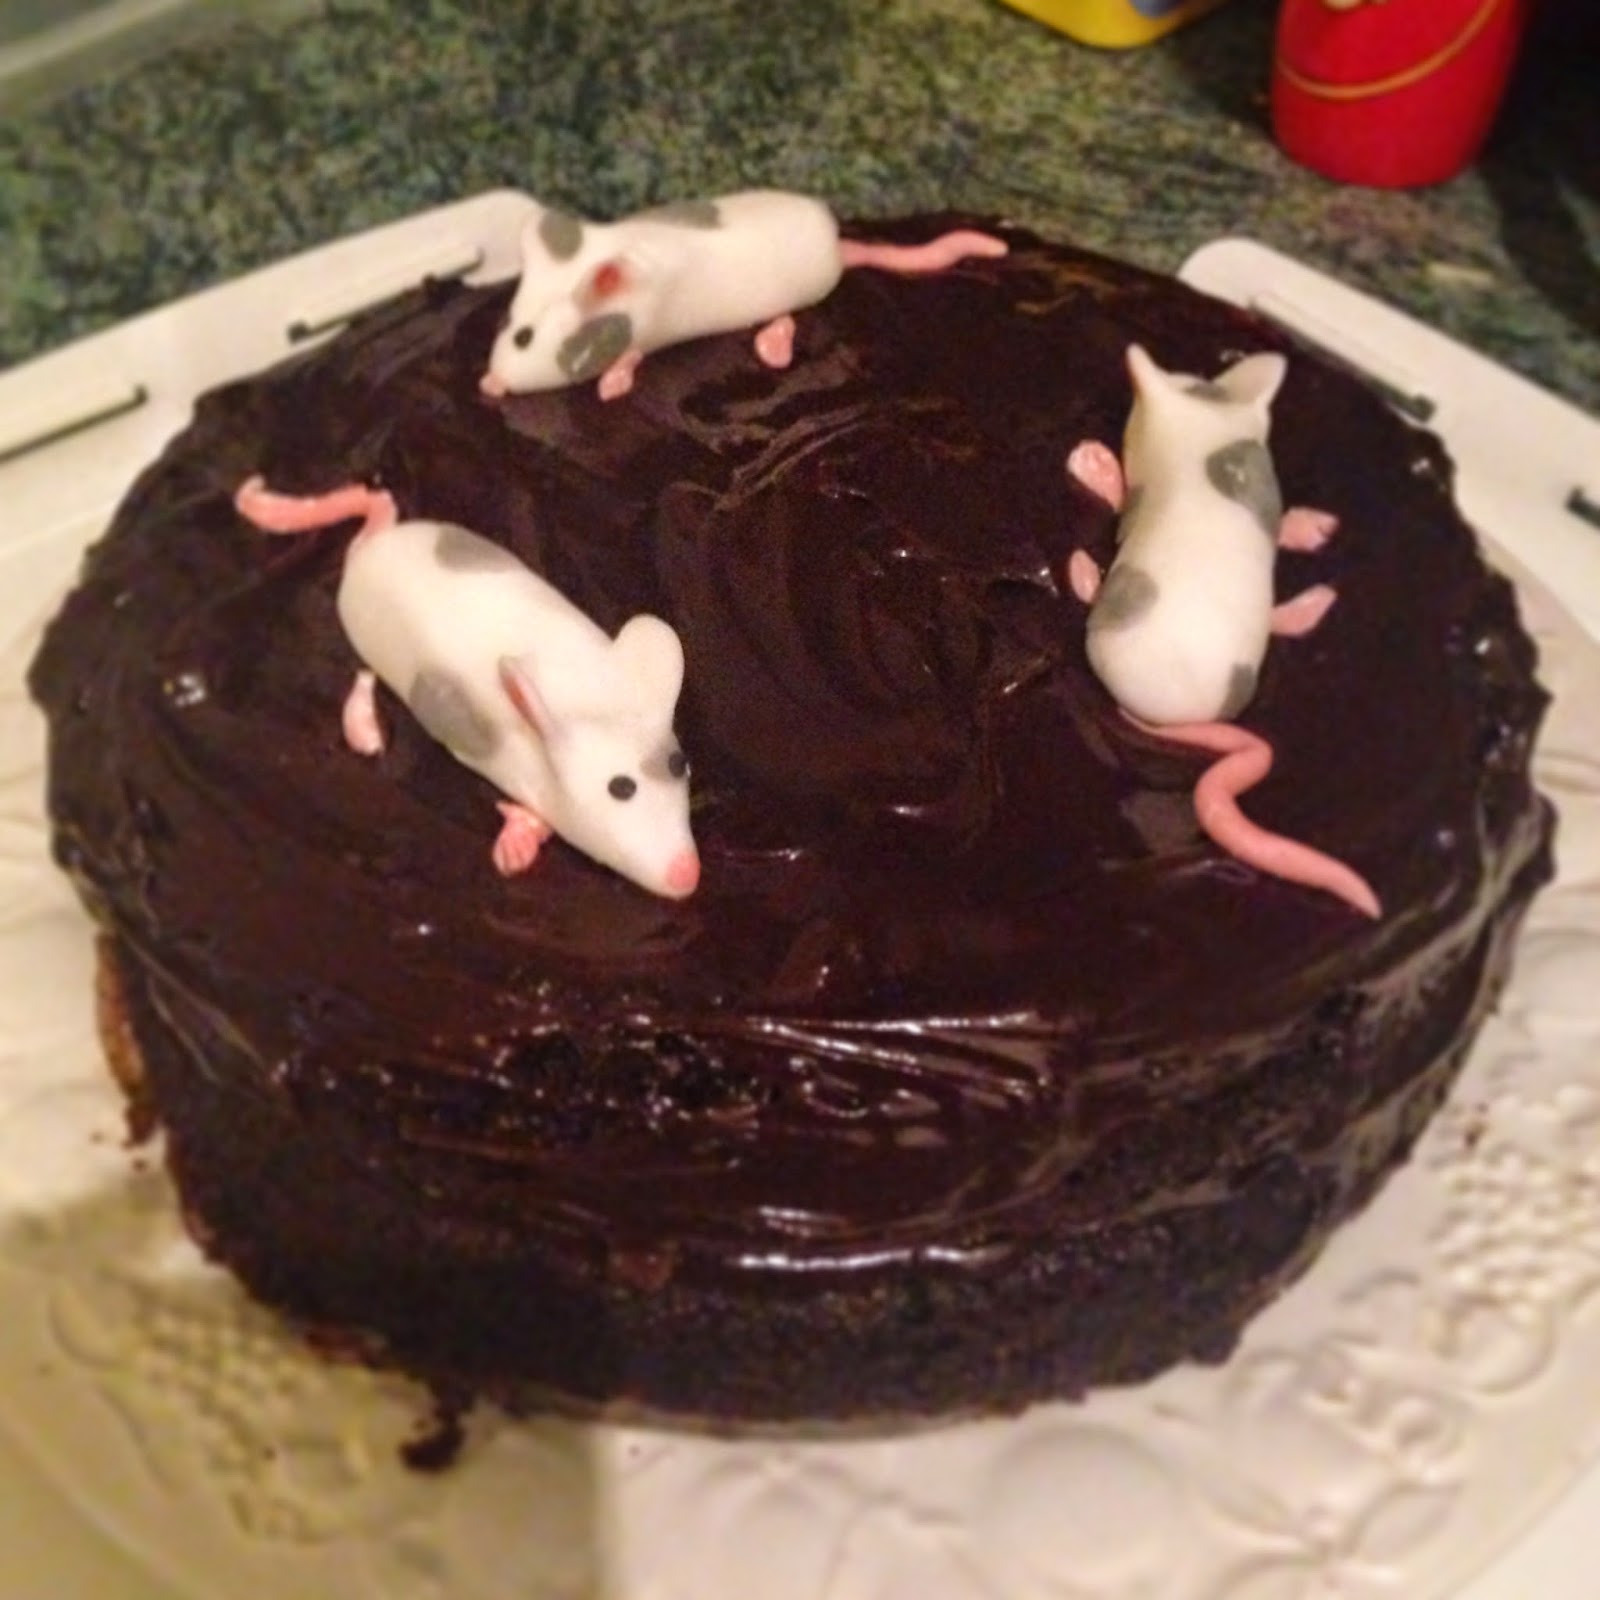
The chocolate fudge rat birthday cake made by me. One of my favourite/weirdest creations.


The most extravagant cake, plain sponge with cream filling, buttercream icing decorated with Malteasers and white and milk chocolate fingers. Made by me.


Strawberry cake with cream cheese icing and topped with strawberries. Made by Annie-two-pies.


Vanilla icing cupcakes with pink glitter made by me and Kath.


Salted caramel cake decorated with mini oreos, chocolate buttons and pebbles. For Olivia's 18th birthday, made by Sophie.


Another birthday cake (I want to say Sophie's 22nd?) plain sponge with cream filling decorated with fruit and chocolate fingers. Made my my mother.


Apple pie made by my nan, decorated with a little mouse and some apples by me.


A trio of brownies, carrot cake and raspberry macaroons. Made by Fiona for a come dine with me night. 


The periodic table of cakes, made to raise money for the ChemSoc. Made a variety of the chemistry PhDs (can't remember everyone...) But decorated by me, Jaclyn, Fiona and Iain.


Millionaire shortbread with plain and white chocolate. Made for a group meeting by me.


This has made me hungry, thank goodness it is Sunday tomorrow!

x x x

Saturday, 2 March 2013

Something you have to try!!

Making your own dress is probably one of the most satisfying things you can do, (and also one of the most frustrating!!). Once you have picked your fabric and your pattern you then have to decipher the instructions, measured yourself (always tricky) and cut out all the pattern pieces... then it is time to pin and tuck and pleat and iron until you have your perfect dress. 

I would recommend to give it go. Even if your hem is a bit wonky, or buttons aren't perfectly spaced out that's fine because YOU made it!! It always feels amazing when someone asks 'oh where did you get that dress, it is lovely' and you can reply with great pride 'I made it!!'.

So next time you see a pattern you like, give it a go!! Even if it takes agggess, just do it! You won't regret it!

I have included these pictures I took whilst putting together one of my dresses! Hope you like it and feel inspired to create something yourself!


If you have any questions or requests feel free to comment or contact me on here. Or you can check out my Facebook page or my twitter!!

Thanks for reading!!

Lots of Love
x x x 

Thursday, 16 August 2012

DIY patchwork quilts

I have been making patchworks for 4 years now maybe, I just did them in my spare time (in the summer holidays usually) and they are simple and fun to do. They also make really great personal presents for people. (People are proper made up when you give them it!!) It is something you would keep forever! What I never realized is how expensive they are if you where to buy one! Hundreds of pounds!! And they are impersonal, sure they look great but £200?? I don't think so!

So I thought I would go through how I go about making one. So I have my own special one, which goes on the end of my bed. It is made up of fabric which has been a part of my life (old curtains from baby room, bed sheets, old clothes) so instead of throwing them away, I made them into something that I could look at everyday, and hopefully pass onto my own children (a long way in the future!!).


So what I first do is cut out squares of the fabric, you can choose what size squares, but I always do 12cm x 12cm. But that doesn't really matter as long as they are squares. You can use a paper template if it makes it easier. I then cut out more squares, I usually aim for a quilt of 12x12 squares, so that is 144 squares (!!) this is the most time consuming bit, but you can do it watching the telly! 


Next I machine sew the squares into strips of 12 squares, I like to alternate the squares but you don't have to, it is entirely personal preference. 


I then sew the strips together to get one huge square. If you feel like the square is too small, or needs neatening up, I sew a large border around the patchwork area of one colour. I finishes off it nicely I think, and makes it look less busy. All that is left to do is but a lining on the other side. I usually use a padded lining (already has wadding attached). This gives the blanket a bit more weight, but again it's personal preference. You can just use ordinary lining.


So attach this lining, you put the two right sides of the fabric facing together (inside out) and sew all around the edge leaving a gap of about 15cm. You then pull the fabric through so now the right sides of the fabric are now facing away from each (the right way round) you can then hand stitch the hole closed. You then can either sew an edging around the fabric, or just machine stitch an inch all around the edge to finish it off, and again this is personal preference. 


And voila! You have your very own patchwork!! And for literally a few pounds (unless you have to buy all your fabric). Nothing like the price of one from a shop, and these look much nicer because you made it with your own fair hands!!

If you fancy giving this ago, and need tips, or even if you want me to make you your very own, feel free to message me, comment, or go on my twitter or Facebook  and get in touch with me there!!

Hope this has inspired you to get the scissors out!!

x x x 

Wednesday, 8 August 2012

OOTD home made ombre shorts 5/8/2012

As I'm quite nifty with a sewing machine and feel I can turn my hand to most things, I decided to turn an old pair of ('boyfriend') ASOS jeans into some ombre denim shorts.

I chose boys jeans as they make better shorts as they usually have straight legs, making them easier to turn up (and then they don't dig into your leg) plus I like a looser fitting jean. So I cut them longer than I wanted them and turned them up twice and held them in place with a few stitches.

Next then ombre. So I took some ordinary household bleach (I think I bought mine in Home and Bargains for about 50p) and poured quite a lot into my washing up bowl and diluted it with a small amount of water. I then wet my shorts so that they were soaking wet. (I did this in the bath).   I then put my plastic gloves on (just the ones from hair dye kits) and dipped my shorts into the bleach/water solution. I dipped them as far as I wanted the lightest part of the shorts to be. I left the shorts dipped in the bleach for about an hour, (I would keep checking for the colour you want). As the jeans were wet already this allows the bleach to travel up the jeans, giving an ombre effect.


Once the desired colour has been achieved I then used my shower to rinse all the bleach from the jeans. These were then left to dry. It is then best to machine wash the jeans, just remove any excess bleach or dye to prevent it from transferring. 

I was rather pleased with the results and wore them in an outfit.


So I teamed my newly ombred shorts with a Topshop red checked shirt, Topshop silver and jade collar tips, Primark plaited brown belt, black tights and a pair of black creepers (not shown). 

This, believe it or not is a summer outfit!! (yes the weather is this rubbish in Liverpool) Let's pray for good weather so I can wear these bad boys without tights and a white vest!!

x x

Thursday, 26 July 2012

Alterations By Emily

So.... recently I've started u my own company (ish) which is basically just alterations (taking up sleeves, trousers, taking in shorts etc) repairs and custom pieces. It's been going rather well recently, so many people hide things away in there wardrobes thinking one day they get it repaired or altered and forget about them, so in a way I am rescuing clothes everywhere from a life hidden at the back of the wardrobe or even the bin!!


I also do custom pieces, patchworks (i've done so many!!), embroidered cushions, fancy dress items and even a lampshade or two!! These are the best things that I do, you can proper let your creative side run wild.


So I will be doing individual posts on specific things I've done recently, but for now I'm just going to put a few pictures of some work I've done!! Hopefully give others inspiration to do the same thing!!
Most the things I do are really easy and cheap, but require a lot of time and patience to get them done perfect, which I don't mind! And i have quite a lot of spare time at the moment to do them!!


Much love x x x